How to Install Roundcube Webmail on Linux CentOS Fedora Ubuntu Redhat Linux
License
Roundcube Webmail is released under the GNU General Public License (GPL).
Server Requirements
* Apache or Lighttpd webserver
* PHP Version 5.2.1 or greater
* MySQL, PostgreSQL, SQLite or MSSQL database
* An IMAP server which supports IMAP4 rev1
* An SMTP server (recommended) or PHP configured for mail delivery
Installation Procedure
Download the latest stable version of RoundCube web mail from http://www.roundcube.net and copy it to your web server using winscp or other preferred method
1)Roundcube Webmail installation
Login to your Apache server host through shell (putty)
Un tar roundcubemail-0.3.1.tar.gz in the web root directory
#tar -xvzf roundcubemail-x.x.x.tar.gz -C /var/www/html/
#cd /var/www/html
#mv roundcubemail-0.3.1/ roundcubemail
#cd roundcubemail/
RoundCube needs to save some temp files and it also writes logs. Therefore make sure that the following directories (temp,logs) are writable by the web server user
#chown -R apache.apache logs temp
Configuration:
2) Mysql configuration:
Login to your mysql server through shell (or webmin) and Create a database for your webmail (You can use the same server for both Apache and MySQL)
Example: db name – roundcubedb, username – roundcubeuser , password – roundcubepwd (your choice)
#mysql -u root -p ( enter the mysql root password)
mysql> create database roundcubedb;
mysql> grant all privileges on roundcubedb.* to roundcubeuser@localhost identified by ’roundcubepwd’;
mysql> FLUSH PRIVILEGES;
mysql> exit
Above commands will create a database roundcubedb with the required permissions.
If you are ruining Apache and mysql in different servers, you have to grand privilege for roundcubeuser@apacheserverip
Now import the table layout
#mysql roundcubedb < SQL/mysql.initial.sql -u root -p
(enter the root password or mysql server)
Create the config file from samples
#cd config/
#cp db.inc.php.dist db.inc.php
#cp main.inc.php.dist main.inc.php
Edit Database Configuration File:
Edit the db.inc.php file and replace the below lines with your database access details
#vim db.inc.php
$rcmail_config[‘db_dsnw’] = ‘mysql://roundcubeuser:roundcubepwd@localhost/roundcubedb’;
3) Apache Server Configuration:
DNS Configuration:
Add dns entry for your support website ( webmail.example.com to 192.168.1.3 (replace with your ip) )
If you don’t have dns server already running, you can use the ip directly
Edit Apache Config:
edit /etc/httpd/conf/httpd.conf and add the following configurations
< VirtualHost 192.168.1.3:* >
DocumentRoot /var/www/html/roundcubemail
ServerName webmail.example.com
RewriteEngine on
RewriteCond %{REQUEST_METHOD} ^(TRACE|TRACK)
RewriteRule .* – [F]
< Directory “/var/www/html/roundcubemail” >
DirectoryIndex index.php
< /Directory >
Options ExecCGI
< /VirtualHost >
If you don’t have DNS server you can skip the above step
and add alias for this mail directory
#vim /etc/httpd/conf/httpd.conf
Alias /webmail “/var/www/html/roundcubemail”
Restart apache server
#service httpd restart
4) Installer config:
edit main.inc.php file and enable the installer and check all the required modules are present, php config, etc
#vim main.inc.php
$rcmail_config[‘enable_installer’] = true;
Now you can Point your browser to http://url-to-roundcube/installer/ (http://192.168.1.3/webmail/installer)

After checking this installer script you can disable the installer
#vim main.inc.php
$rcmail_config[‘enable_installer’] = false;
Now you can start using your webmail through browse
your webmail url http://webmail.example.com or ip (from remote computer)
If no dns server configured , use alias http://192.168.1.3/webmail ( from local host http://localhost/webmail)
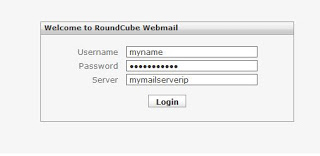
Here you can enter your username, password, mail server details and start browsing your mails
You can start using the webmail with the above configuration itself. Below I have mentioned optional configurations.
5) Customizing the Configuration
IMAP server configuration:
By default the login screen provides a text box where you need to enter the IMAP host which you want to connect to.
If you dont want your users to enter the mailserver details, you can hide this by setting one fixed IMAP host address
#vim main.inc.php
$rcmail_config[‘default_host’] = ‘yourmailserverip’;
$rcmail_config[‘smtp_server’] = ‘yourmailserverip’;
If you want to add multiple servers
$rcmail_config[‘default_host’] = array(
‘mail.example.com’ => ‘Default Server’,
‘webmail.example.com’ => ‘Webmail Server’,
‘ssl://mail.example.com:993’ => ‘Secure Webmail Server’
Deleted messages:
Some mail clients just mark messages as deleted and finally remove them when leaving the application.
RoundCube by default move messages to the Trash folder when hitting the delete button.
However this behavior can be changed by unsetting the ‘trash_mbox’ property and enabling ‘flag_for_deletion’.
Your configuration could look like this:
$rcmail_config[‘trash_mbox’] = ”;
$rcmail_config[‘flag_for_deletion’] = true;
$rcmail_config[‘skip_deleted’] = false;
Messages will now be marked as deleted which can be reverted again. To finally remove them, the user needs to click “Compact” below the folder list.
6) Other Configurations:
PostgreSQL:
To use RoundCube with PostgreSQL support you have to follow these
simple steps, which have to be done as the postgres system user (or
which ever is the database superuser)
$ createuser roundcube
$ createdb -O roundcube -E UNICODE roundcubemail
$ psql roundcubemail
roundcubemail =# ALTER USER roundcube WITH PASSWORD ‘the_new_password’;
roundcubemail =# c – roundcube
roundcubemail => i SQL/postgres.initial.sql
All this has been tested with PostgreSQL 8.x and 7.4.x.
Older versions don’t have a -O option for the createdb, so if you are
using that version you’ll have to change ownership of the DB later.
7) Common Problems:
500 Internal Server Error::
Using MySQL – Database Error | Failed Connection
#mysql roundcubedb < SQL/mysql.initial.sql -u root -p
Using mysql- Database error Solution
mysql roundcubedb < SQL/mysql.initial.sql -u root -p (Please run this command)