Steps for creating the Dell System E-support Tool (DSET) 1.9 in ESX 4.0
Please find the Link below:
Dell System E-support Tool (DSET)
Steps for creating the DSET 1.9 in ESX 4.0
- Copy the DSET bin file to root using WinScp or some other utility
- Give the required permissions to the file using root or SU user credentials. Please use the command ‘CHMOD777
- Execute the DSET file using the command <./ DSET file name>
- The report would be created in the root folder
- The report can be exported back using WinSCP or any other utility.
- Please check the below screen shots for reference.


Browse to the location where you downloaded the file and open a console or command prompt. Run the DSET binary from the console or command prompt: ./delldset_v1.9.0.131_A02.bin

Once the Dell license is accepted, follow the binary wizard instructions to do any of the following:1. Read DSET Release Notes First – Displays the README contents
2. Create a DSET Report Only – Loads DSET to create a standard system configuration report which is typically written to the current user’s home directory
3. Clear ESM Hardware Log – Clears the log of any past hardware events. This also typically resets the PowerEdge amber warning light to blue
4. Install/Upgrade DSET Application – Permanently installs DSET for
repeat use


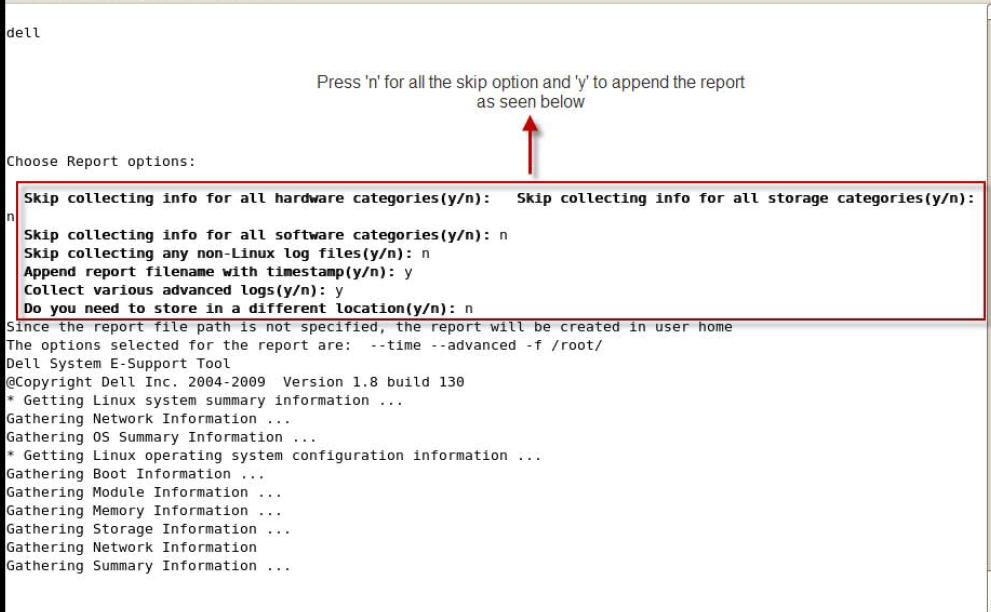

The report would be created in the root folder
The report can be exported back using WinSCP or any other utility.